Making Inlaid Veneer Trays
The trays consist of a veneered plywood "panel" and a hardwood "rim" of two sides and two ends. The plywood panel is baltic birch, which is much higher quality and consistency than typical cabinet plywood. The upper side of the plywood is covered with the veneer pattern inlaid into the "field" or background veneer, and the under side is covered with matching background veneer.
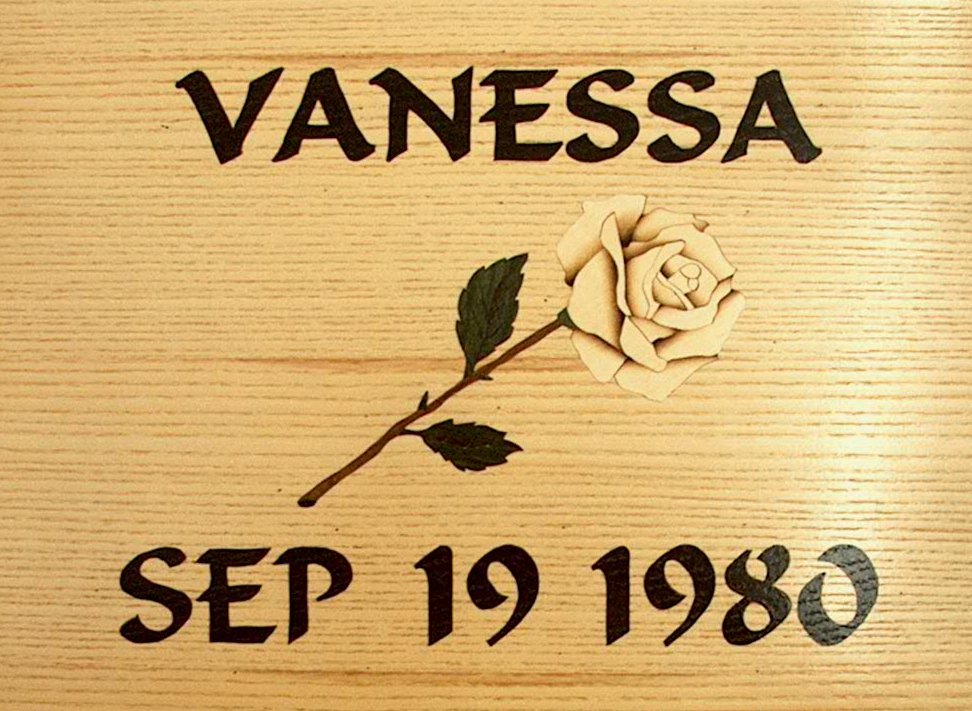
Tray design consists of determining the text and accompanying decoration (if any); choosing the veneer to be used for the field or background (first), text and decoration; and selecting the hardwood for the rim. The text can be in a straight line, or along an arc. Decorations have included a black/white/black or similar border, a dachshund silhouette, a compass rose, a six point star, and a white rose. (When time permits, some samples will be tried with common wildflowers, starting with white trillium. Additional suggestions are greatly appreciated.)
The last step in the design process is to "draw" the design using a CAD program to check proportions and overall appearance, and to print a pattern for layout and scroll sawing.
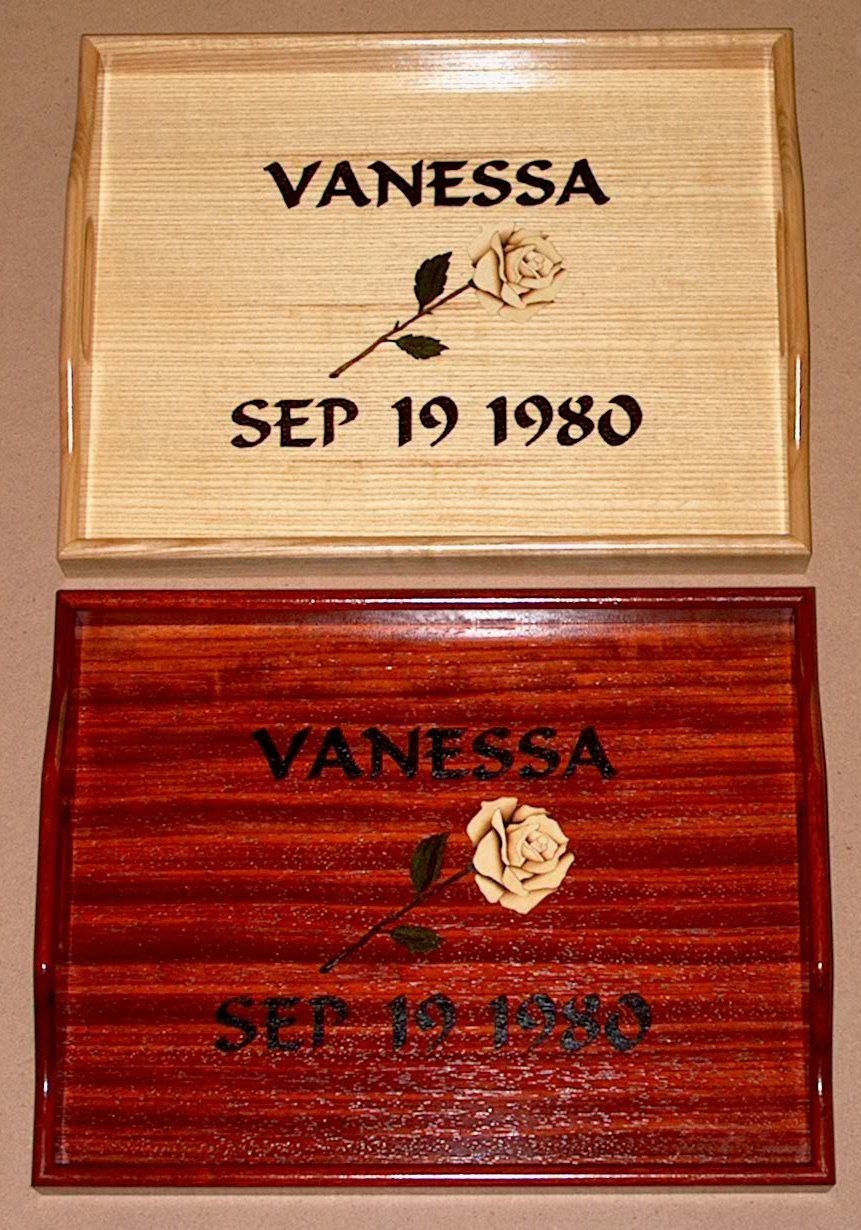
Several of the following pictures were taken during construction of a special birthday gift. With prior permission, a duplicate was made to serve as a permanent sample or model.
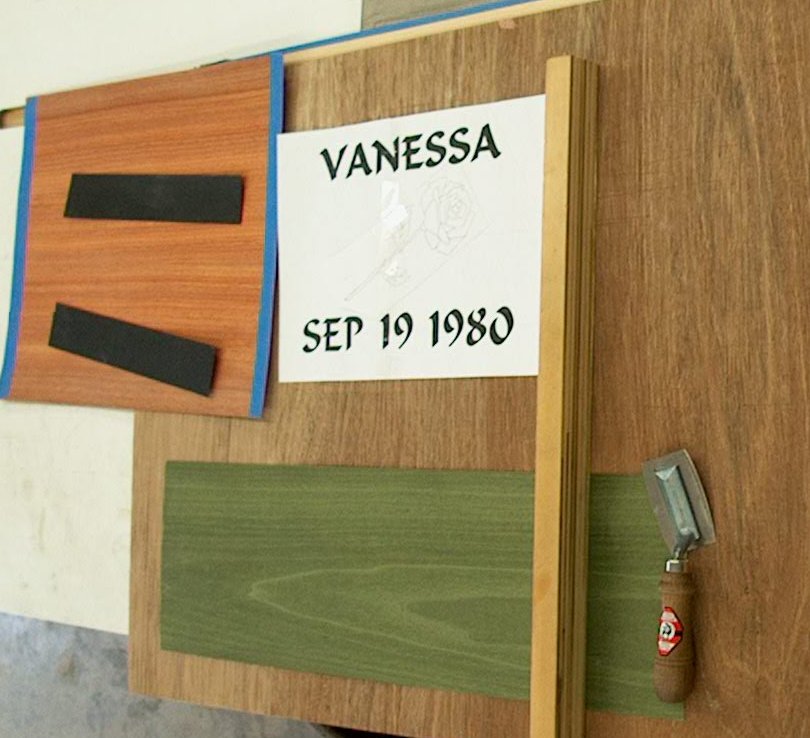
The first "production" step is to cut to size the various pieces of veneer that will be used to make the tray's panel. Both sides of the panel will be covered with the field veneer, here single pieces of padauk. Also visible are sized pieces of black-dyed costello for the text and green-dyed poplar that is being sized for the leaves of the rose.
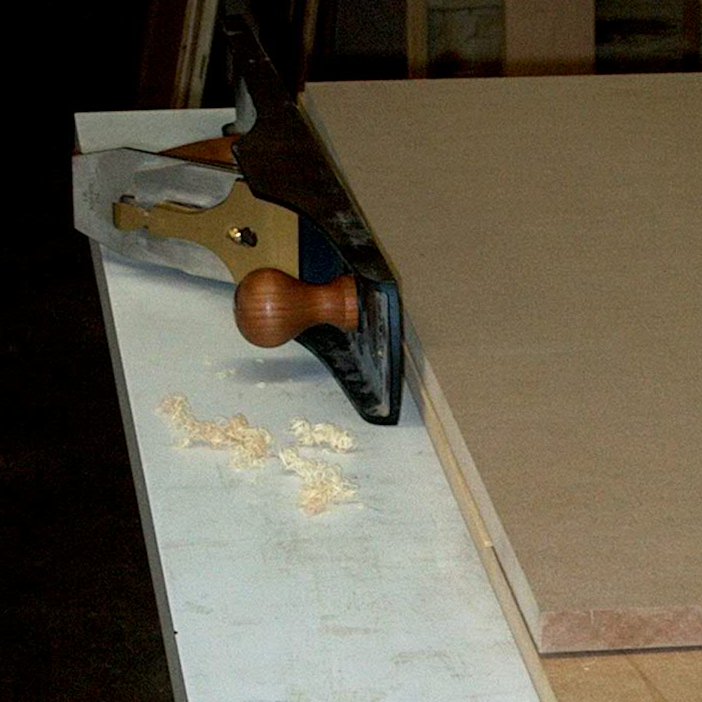
More often, two or more narrow pieces of veneer have to be joined to make the field for the upper and lower faces of the panel. Those edges have to be perfectly straight, usually not obtainable with just a straightedge and knife. One way to straighten those edges is to temporarily tape them together, hold them between two pieces of plywood or other sheet good, and then "shoot" them with a long plane.
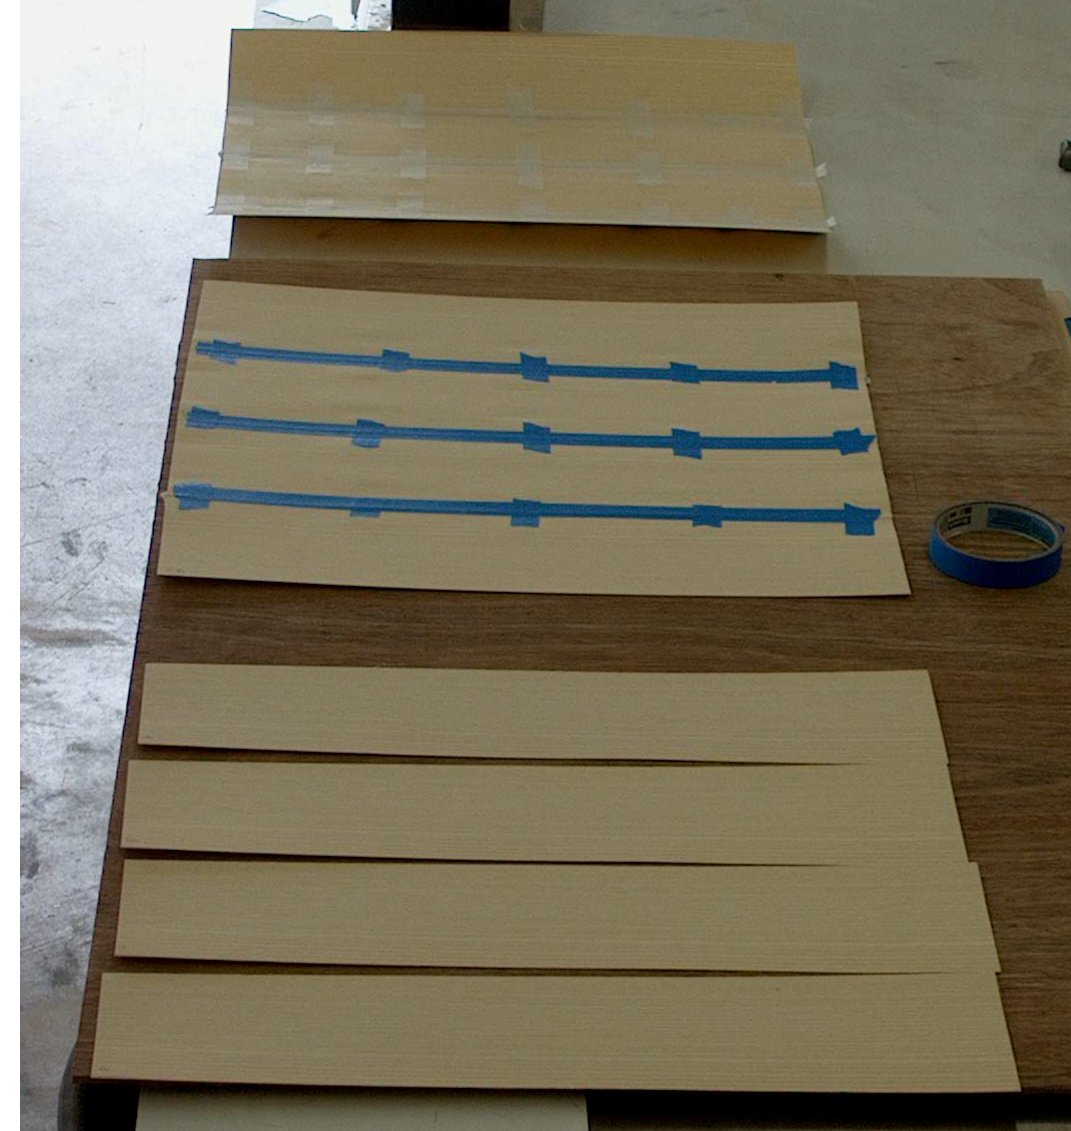
After the edges have been straightened, the pieces of field veneer need to be assembled into a single piece. They are placed side by side and on the "show" side temporarily pulled together with a few cross strips of blue masking tape. The assembly is then turned over and taped more securely on the "glue" side with more blue masking tape. Finally it is turn back over, the initial strips of blue masking tape removed, and across and lengthwise strips of veneer tape applied. This veneer tape will remain in place until the veneers have been permanently glued to the plywood panel. The blue masking tape on the glue side will not be removed until gluing.
In this picture, the strips of white ash at the bottom are ready for taping. The middle assembly shows the glue side after thorough taping with blue masking tape. The top assembly shows the show side after applying veneer tape.
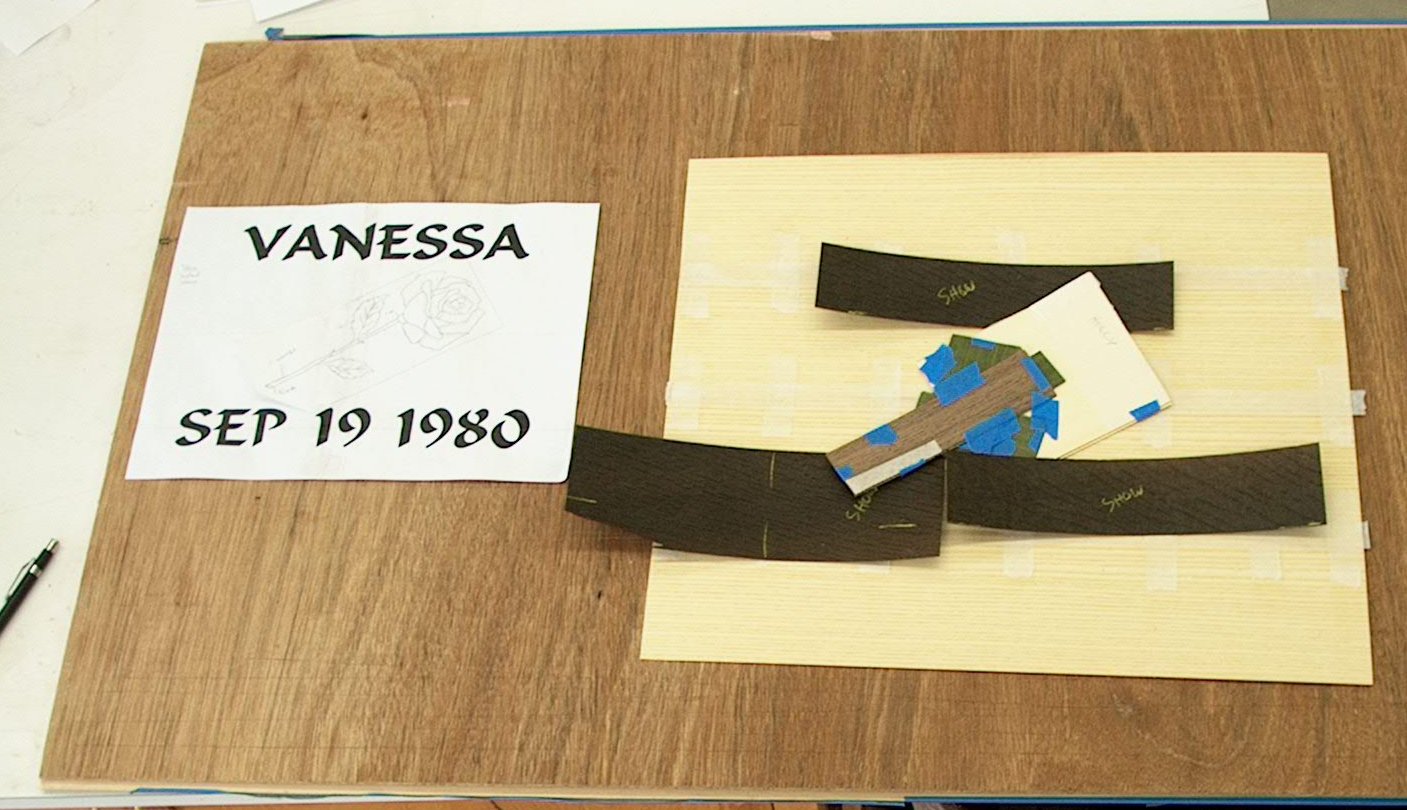
With the pattern close by, the various pieces of veneer are being placed on the field to make a "packet" or sandwich for scroll sawing. The six pieces comprising each of the two roses have already been joined into a sub-assembly. Two trays will be made simultaneously, so the overall packet will consist of padauk and white ash fields, two pieces of black for the name and two for the birthdate, and ten pieces for two roses (one green dyed poplar for the leaf on the left side, one for the leaf on the right side, one for the calyx, one brown walnut for the stem, one black dyed costello for the cut end of the stem, and one piece of holly for the flower petals).
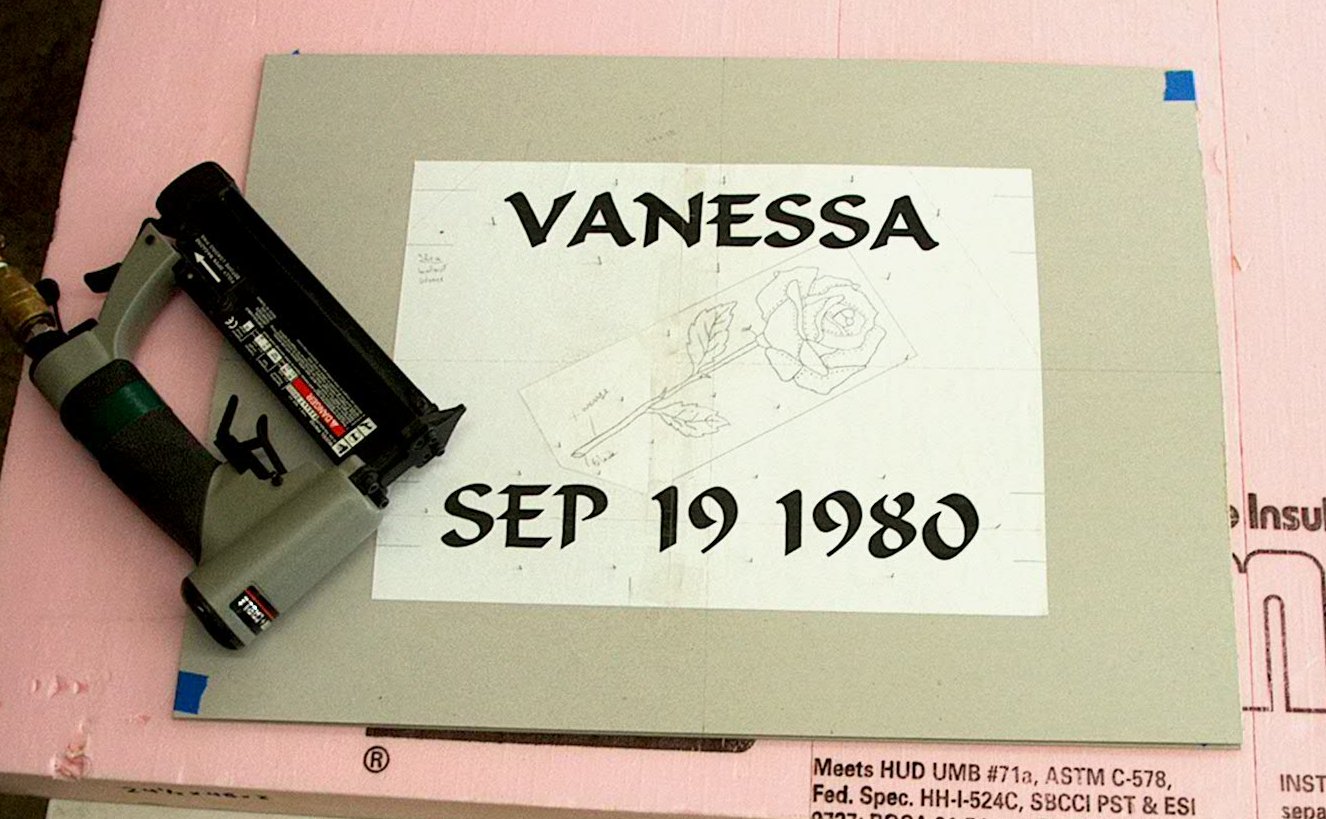
The packet consists of a bottom sheet of "chipboard" cardboard, the various pieces of veneer, and a top sheet of chipboard to which the pattern has been adhered. This packet is held together with very narrow nails, commonly called "pins." Here the pins have been placed and clenched over.
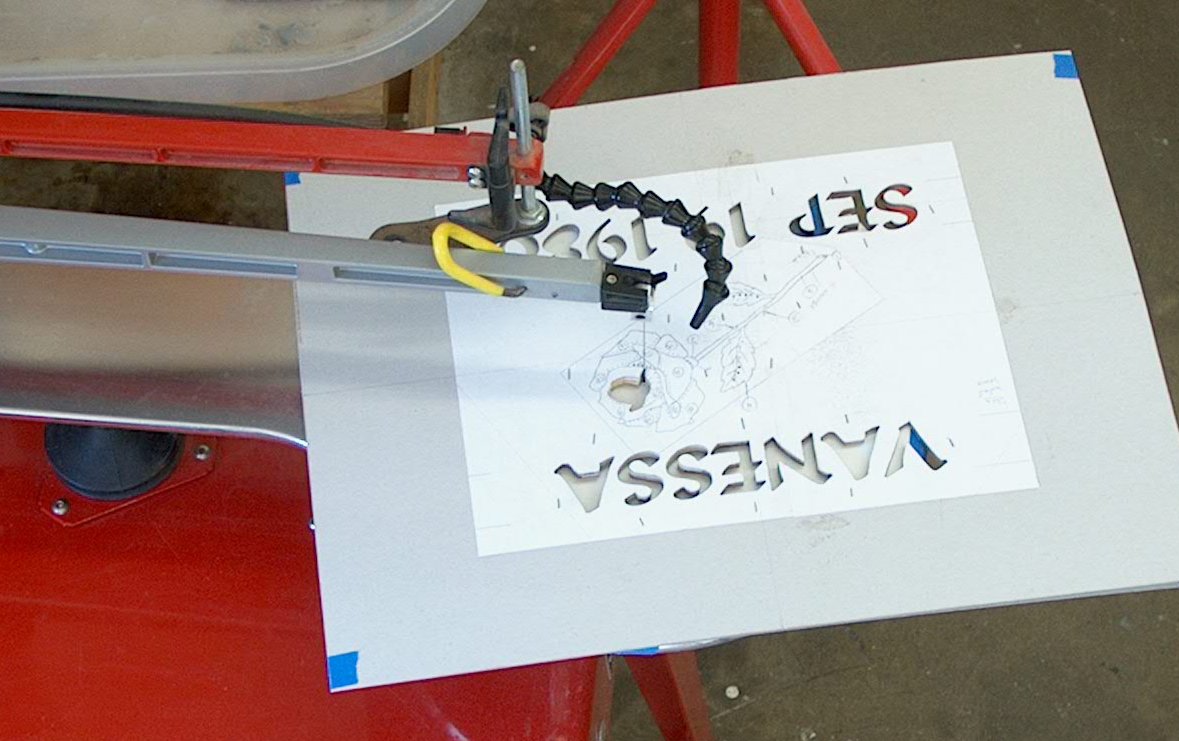
For each piece in the pattern, a number 5 standard sewing needle makes a very small starting hole, through which a 2/0 scroll saw blade is fed. As the veneer packet's piece is sawn free, it is placed in a dedicated storage area. On this pattern, there are sixteen numbers and letters, and twenty-five parts of the rose.
After sawing is finished, the packet is disassembled. The letters and numbers are placed in the fields with blue masking tape and then veneer tape. The stems of the rose are placed with blue masking tape.
(The photo shows the result of sand shading.) The leaves and petals are "sand shaded" or scorched with hot sand (to create a three dimensional look) and placed with more blue tape, and then the entire rose covered with veneer tape.
After final inspection, the front and back veneers are glued in a vacuum bag to the baltic birch plywood cores.
After the glue cures, the veneer tape is removed and the panels sanded on each side progressively with 80, 150, and 220 grit sandpaper using a random orbit sander. Each side is then hand sanded with 320, 400, 600 and 800 grit sandpaper to remove even minor blemishes and roughness and bring out the character and luster of the veneers. This level of sanding is not performed for typical woodworking projects, but these inlaid trays deserve the highest level of workmanship.
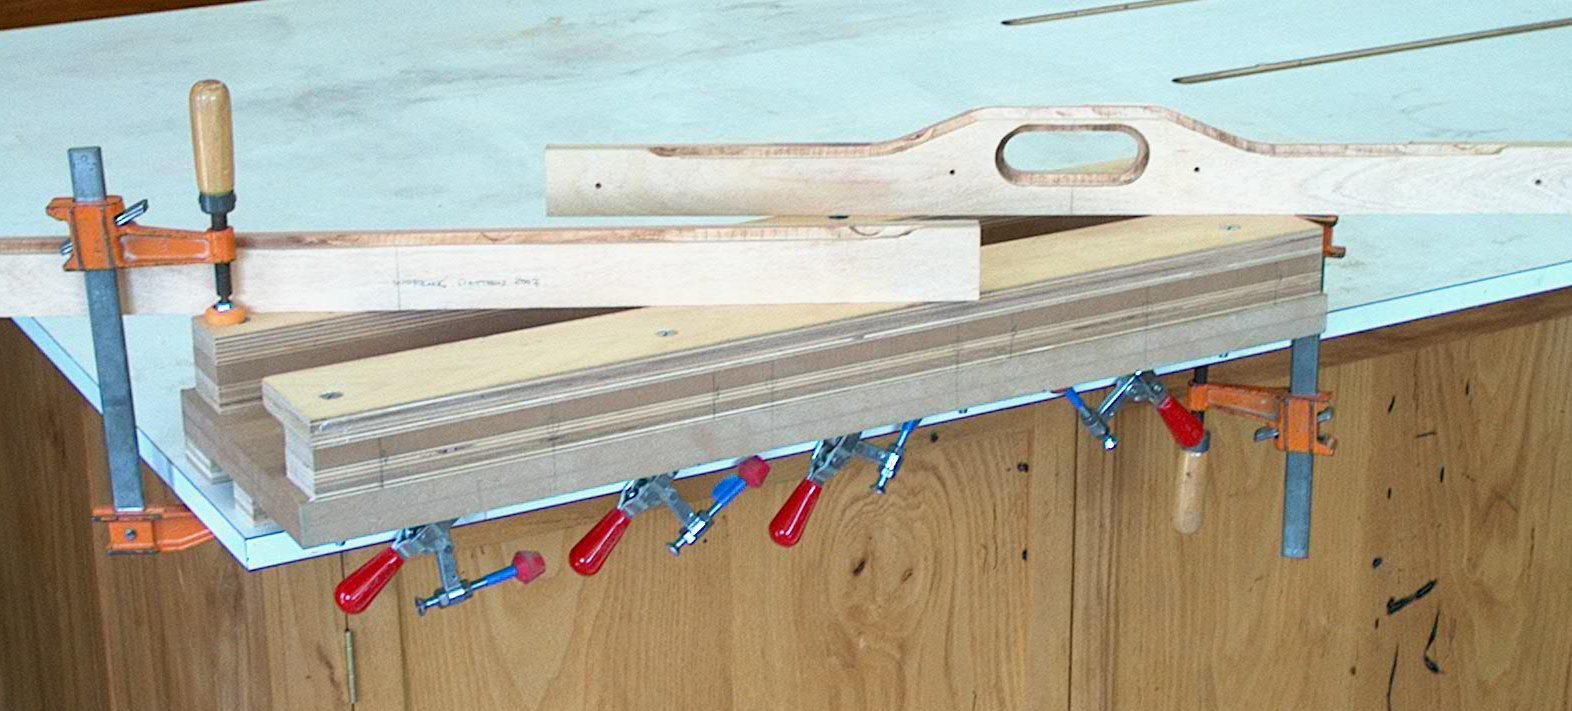
To begin the rims, patterns are traced on boards. The ends are cut out on a bandsaw and the sides on a tablesaw.
After flattening one side and making one edge perpendicular to it on the jointer, the pieces are brought to final thickness on the planer.
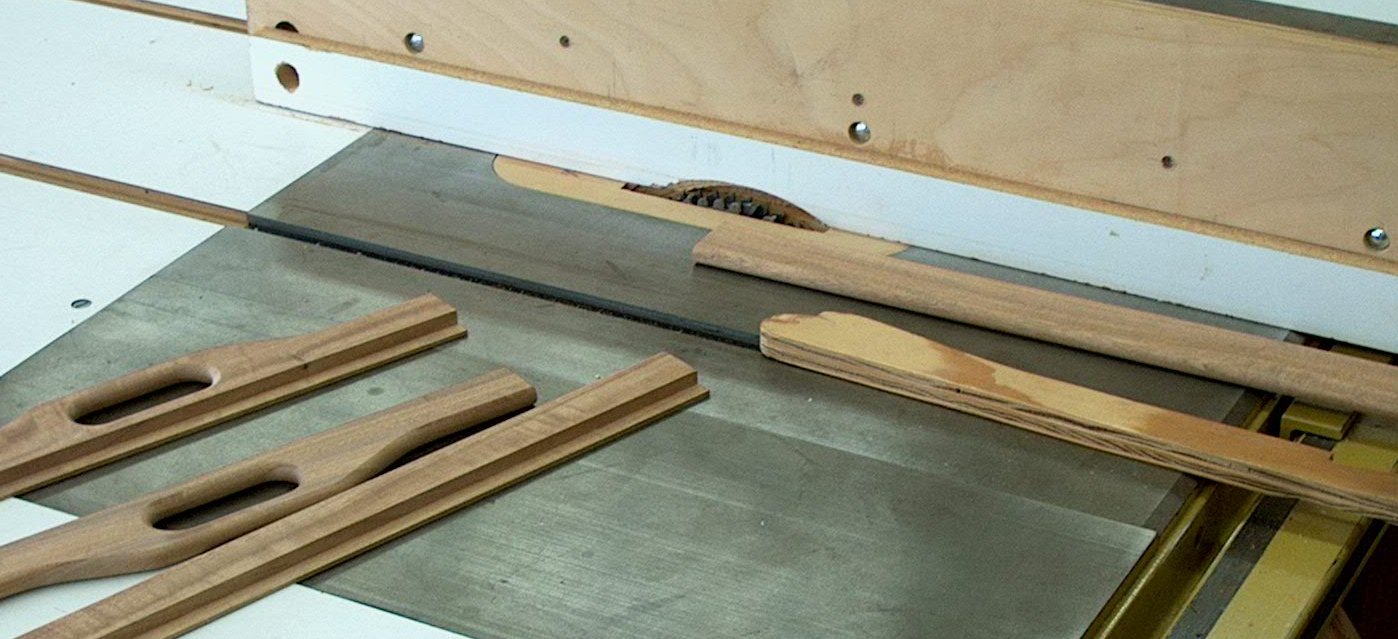
The hand grip openings are roughed out on the drill press.
A set of custom templates and jig are used with a router to round over the hand openings and the upper edges. So that the rounding over is symmetric, it is performed twice, from each side of the rim pieces.
Some time is required to set the table saw to make a rabbet about 1/32" deeper than the thickness of the veneered tray panels. Because a fair amount of wood is being removed, each piece is run through the saw twice so the rabbets are identical.
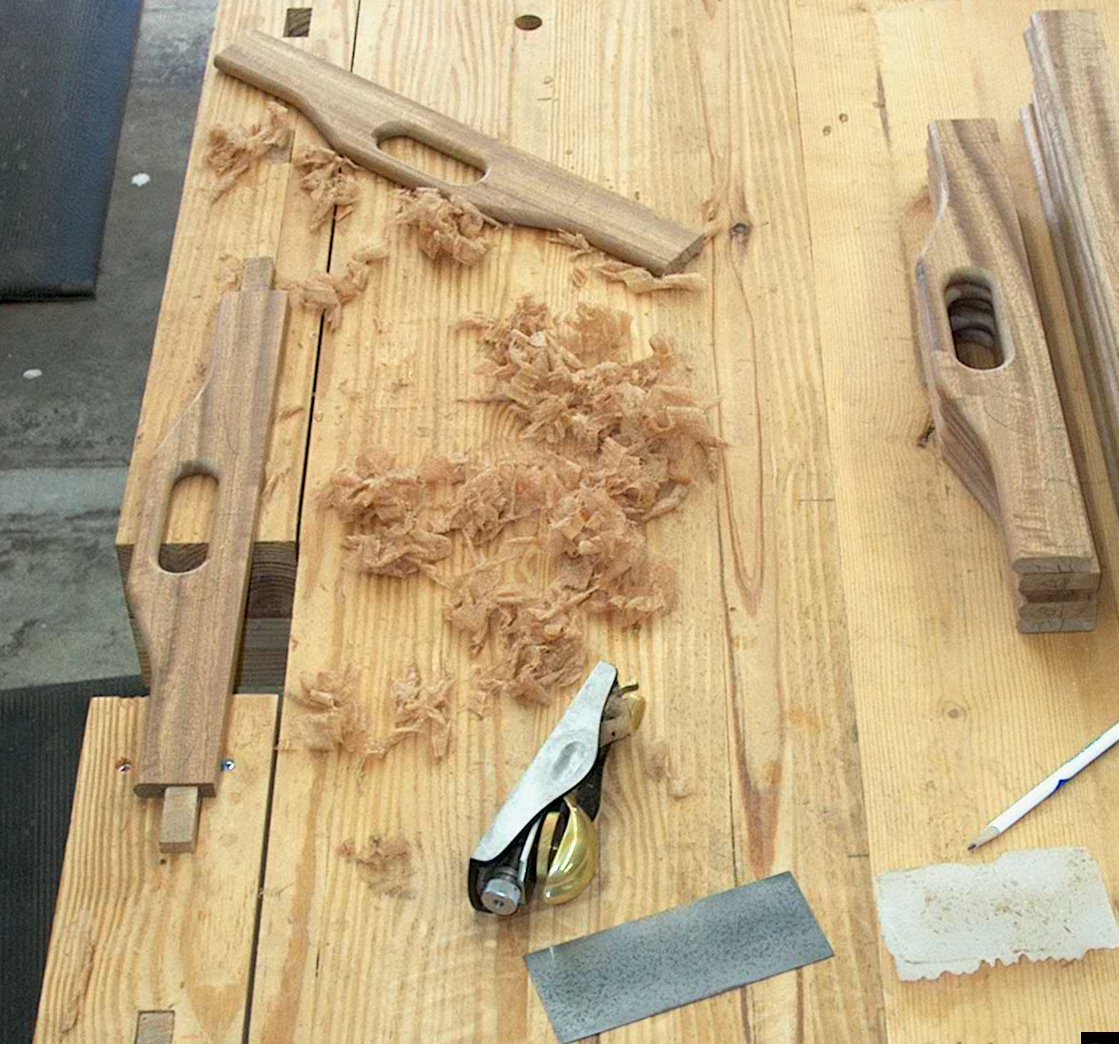
The rim pieces are then smoothed with a high angle block plane (and a scraper as needed) to remove surface roughness. Hand planing is faster than power sanding of the rim components, and leaves a better surface.
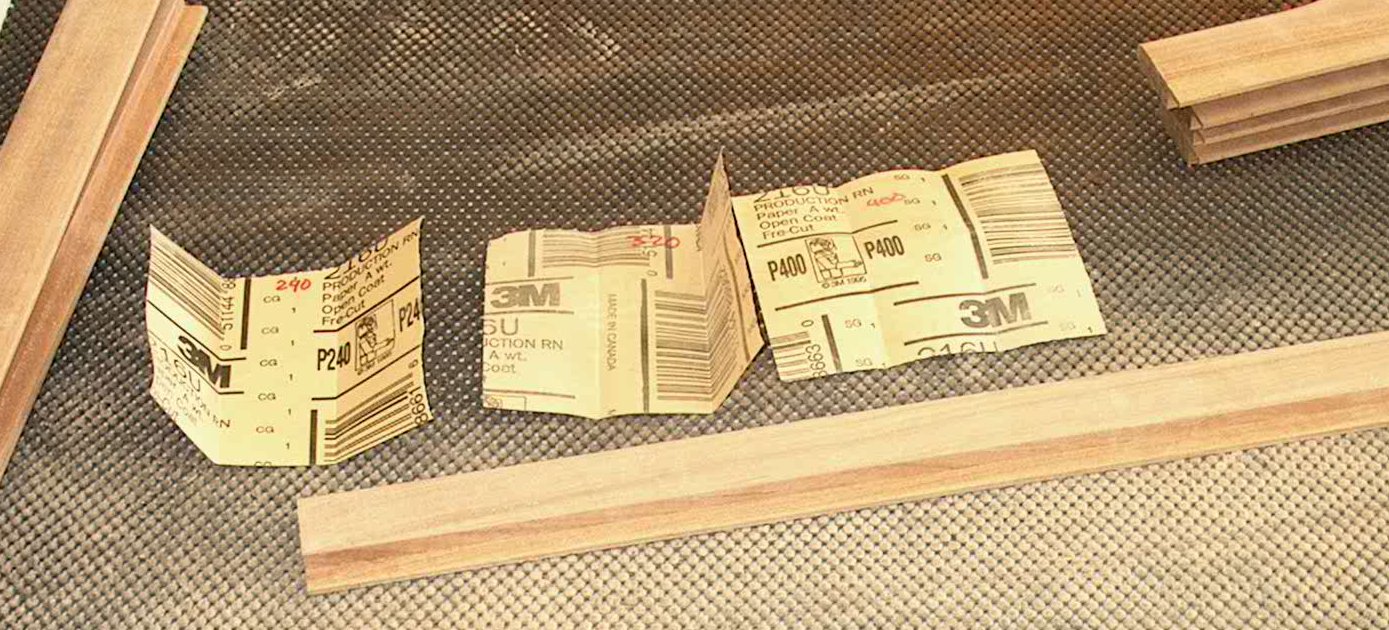
The rounded edges are sanded with 220 to remove router chatter, and then the rounded edges and both sides are progressively hand sanded with 320, 400, 600 and 800 grit sandpaper. The sanding proceeds in two stages, here through 400, and in the second iteration through the final two grits. Hand sanding with the higher grits will reveal tiny spots of minor roughness or small scratches that are carefully removed with additional scraping and localized hand sanding. The higher grits also bring out and emphasize the luster and detail in the wood not visible at more typical 220 or even 320 grit sanding.
Mitering of the rim's corners begins with taping the ends to eliminate chipping. Highly figured wood, most suitable for the rims, is brittle and prone to chips.
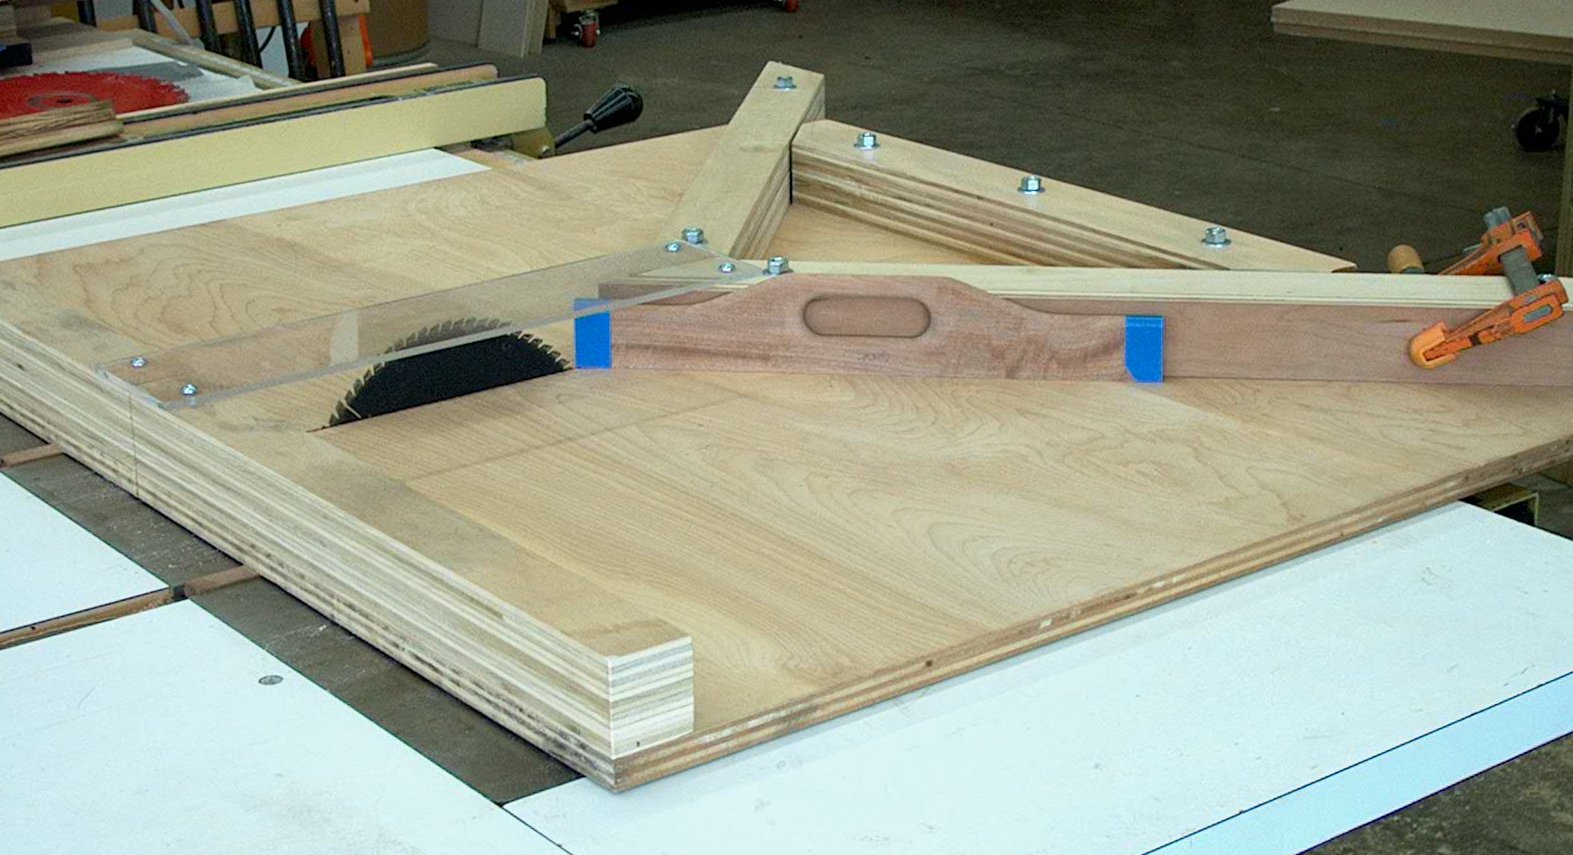
The pieces are cut using a custom table saw sled, first about 1/8" long and then to final length.
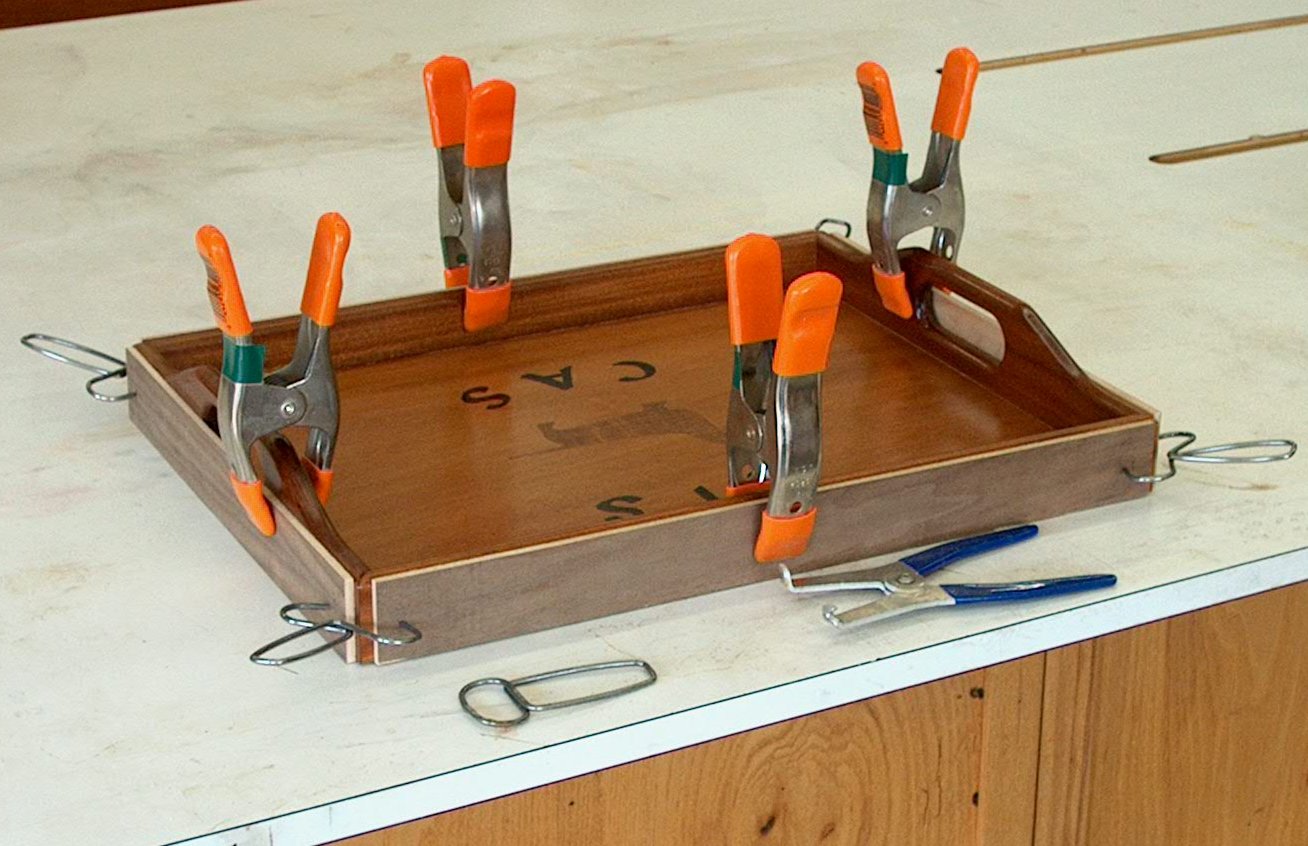
(This is a "posed" picture used an already completed tray to show how the spring clamps are used.)
Hot hide glue is used as it naturally pulls the joint together as it cures and its squeeze-out is more easily cleaned up.
Spring-clamps hold plywood pieces against the rim pieces. Collins spring clips grip these plywood pieces and firmly pull the joints together. Diagonals are measured to insure that the rims are square, and the rims are then allowed to cure overnight.
Any squeezeout is carefully pared away with a sharp chisel. The corners are gently rounded with 800 grit sandpaper.
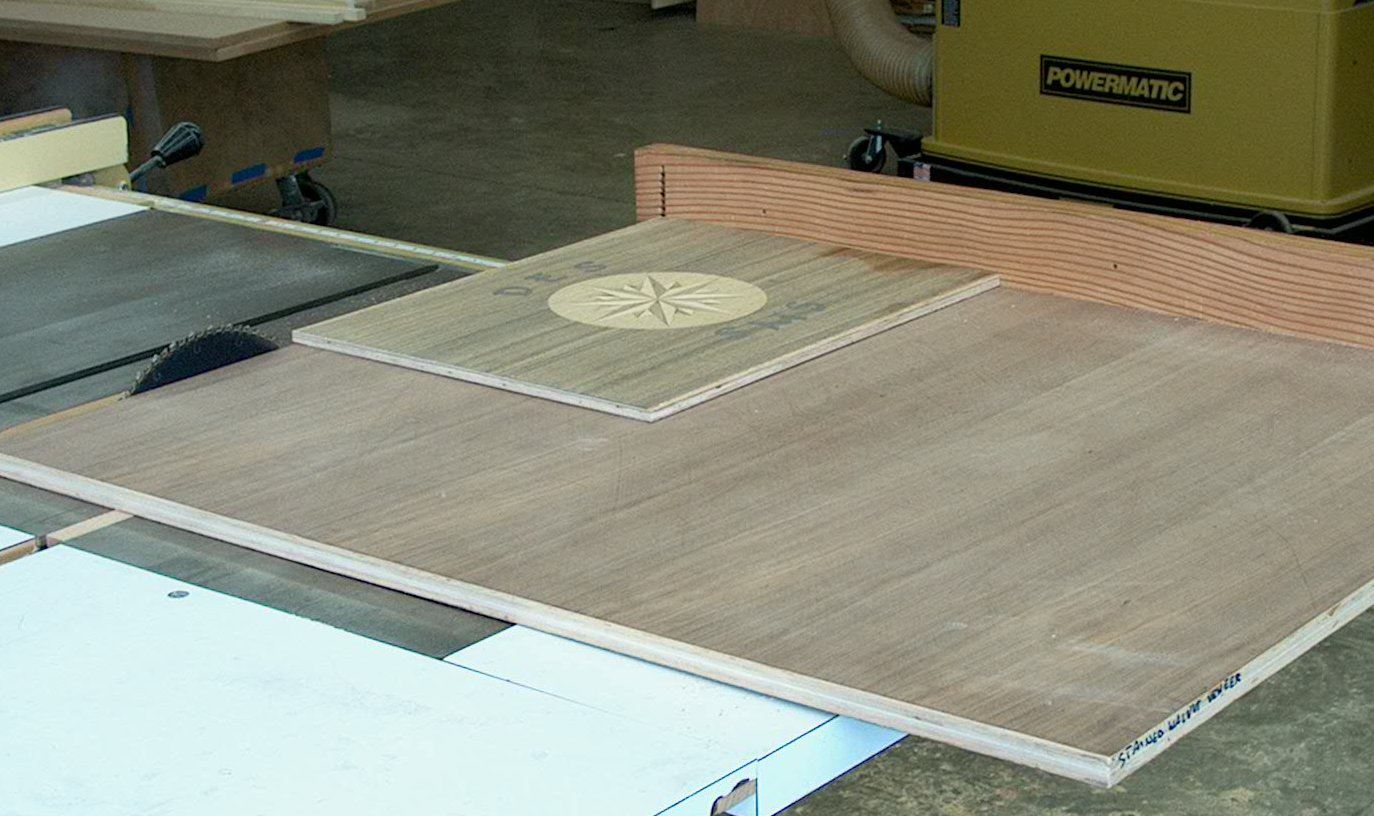
Using another custom table saw sled, each veneered panel is are carefully trimmed to fit its matching rim with the minimum necessary gap. Final adjusting of panel size is made with a high angle block plane.
To install the panel in the rims, hot hide glue is again used, for the same reasons as above.
Because of the rounded top edge of the rims, clamps are not practical (they also could damage the carefully sanded surfaces). To hold the panel in place while the glue cures, very narrow pins are installed using a pneumatic nailer.
After the glue cures overnight, the bottom of the rim is carefully scraped and sanded flush with the bottom of the panel, and the outside bottom edge gently rounded with 800 grit light hand sanding.
The finishing process is equal to the care and effort invested in every step of making and sanding the trays.
The completed trays are carefully dusted with a high efficiency woodworking vacuum. They are then wiped with a 50-50 mixture of water and denatured alcohol to remove any lingering traces of sanding dust. After drying, they are carefully inspected. If the wipe-down raised any grain, it is lightly hand sanded with 800 grit paper, vacuumed, and wiped down again.
Finishing begins with a thin coat of boiled linseed oil to give the wood depth and warmth, and to bring out all the patterns, nuances and character that is present in wood.
After two days of curing, the trays receive two coats of high quality water borne amber shellac to add depth to the finish and further accent the beauty of the wood. Finally, the trays receive two coats of durable moisture resistant water borne hybrid conversion varnish.
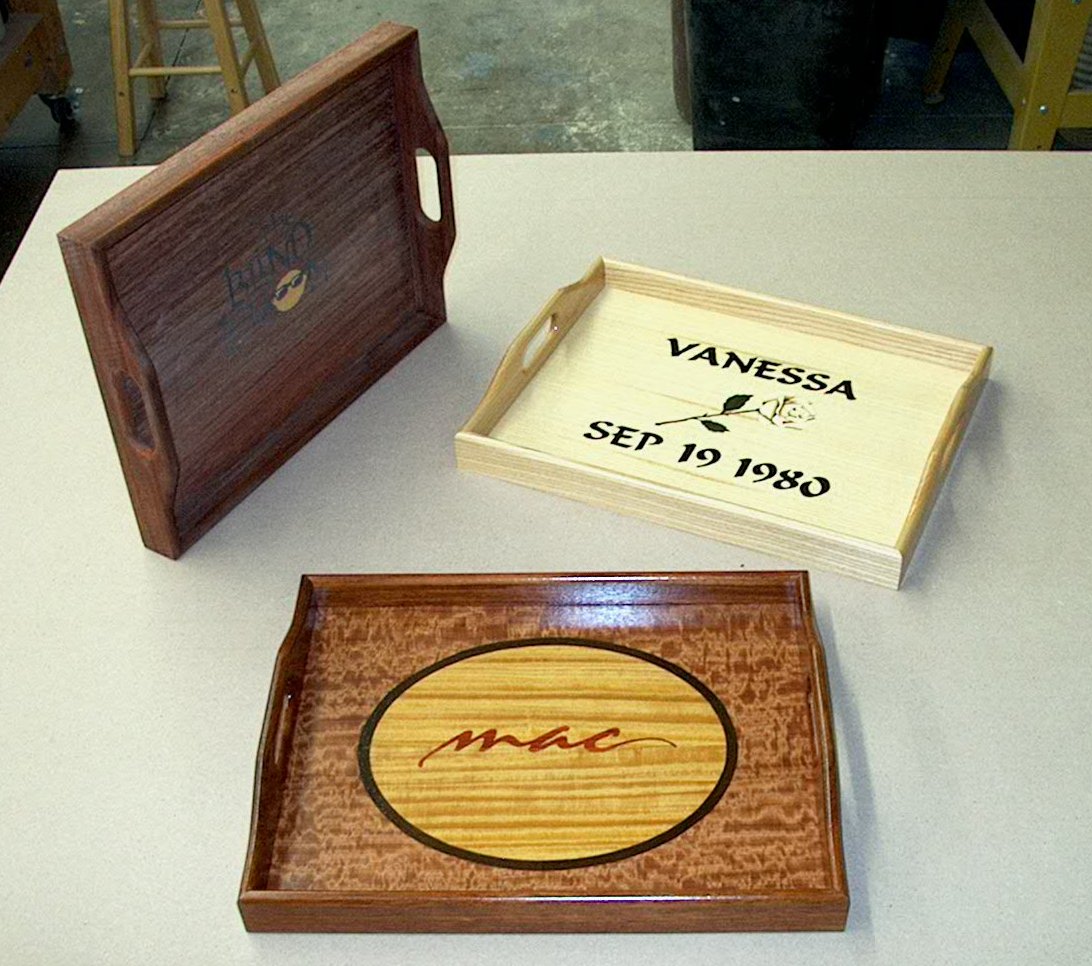
The finished trays are suitable as presentation pieces and also fully functional.
Return to Project Journals page